
Paediatric Specimen Collection
Preparation of patient
Refer to WI ‘Venepuncture of upper limb’
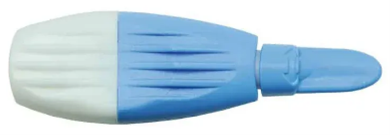
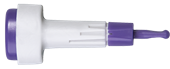
Additional items required for capillary blood collection
| Sterilze gauze | Heel-prick lancet | Finger-prick lancet |
 |  |
👶 Patients <8 Months
Recommended Method:
Heel-prick
Use Only For:
- Bilirubin tests
- Glucose monitoring
- When venepuncture is clinically contraindicated
Venepuncture (Preferred Method)
Use Venepuncture When:
- More than 2 blood specimens are required
- High risk of clotting or haemolysis
- Capillary sampling may compromise result accuracy
Venepuncture Collection Options
- Vacutainer system
- Winged (butterfly) set
- Dripping method
🧒 Patients >8 Months
Recommended method:
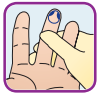
Finger-prick
Use Only For:
- ≤ 2 specimen tubes required
- Low risk of clotting or haemolysis
Venepuncture (Preferred Method)
Use Venepuncture When:
- Multiple specimens required
- Higher sample accuracy needed
- Specimen integrity is critical
Venepuncture Collection Options
- Vacutainer system
- Winged (butterfly) set
- Dripping method
1. Identify the desired puncture site (shaded areas in pictures).
 |  |
Recommended puncture site for heel-prick
| Recommended puncture site for finger-prick
|
2. Pre-warm the puncture site by either massaging the site or using a warm towel for 3–5 minutes, if required.
3. Clean the skin over the selected site with a 70% isopropyl alcohol swab, using a circular wiping motion from inner to outer. Allow site to air-dry.
Note: DO NOT blow or fan the area dry.
4. Remove the lancet from its packaging.
5. Remove the protective cap or shield from the lancet, if provided.
6. Hold the lancet firmly between the fingers.
7. Position the puncture site (foot or finger) in a downward position.
8. Hold the patient’s heel or finger firmly to prevent sudden movement.
9. With the exception of infants, notify the patient of the imminent puncture.
10. Make a single puncture in one smooth motion.
Note: Do not perform immediate repeat puncture at the same site.
11. Immediately discard the lancet into the sharps bin.
12. Apply intermittent gentle pressure to the puncture site, with pressure released between drops to enable blood to refill the capillary beds, then reapplied, repeating until the specimen volume is adequate.
13. Wipe away the first drop of blood with clean gauze.
14. Allow another drop to form.
15. Touch the collection tube to each successive fully formed drop without touching the patient’s skin.
16. Mix the specimen periodically during collection to avoid clotting.
17. Once filling is complete, cap the tube.
18. Apply pressure on the puncture site using clean gauze until bleeding stops.
19. Apply an adhesive plaster to the puncture site.
👶 Newborn <1 month

- Place patient on a bed
- Have a trained personnel immobilise the patient.
🧒 Back to chest
For children who want to observe the procedure

For children unable to sit on their own or anxious of the procedure, comfort position the child
- Place child on the lap.
- Secure the child’s legs by tucking them firmly in between the legs.
- Extend one arm across the child’s chest and hug him/her closely.
- Hold child’s arm (for venepuncture) firmly with the other hand.
- Extend and rest child’s arm on top of the other arm.
🧒 Chest to chest
For children who do not want to observe the procedure

For children unable to sit on their own or anxious of the procedure, comfort position the child
- Place child on the lap, with him/her facing you.
- Allow the child's lets to flank body.
- Use both hands to hug child firmly around his/her back.
- Use one hand to firmly support the child's hand.
- Ensure the child's other hand is securely tucked under your arm.
1. Select a vein (usually the antecubital fossa or hand veins) which is visible, straight, bouncy, soft, and healthy, by gentle palpation.
2. Choose an appropriate gauge hypodermic needle (23G, 24G or 25G) for the size of the patient.
3. Stretch the skin distal to the vein using the non-dominant hand to stabilise the vein.
4. Clean the skin over the selected site with a 70% isopropyl alcohol swab, using a circular wiping motion from inner to outer. Allow site to air-dry.
5. Insert the sterile hypodermic needle at an angle of 10-15 degrees, with the bevel facing up.
6. Place a collection tube at the end of the hypodermic needle cap.
7. Release the tourniquet once blood starts flowing into the tube. The tourniquet should not be applied for longer than one minute when collecting blood
8. Allow blood to drip naturally into the collection tube.
8. Remove the collection tube when the required volume of blood has been collected.
9. Withdraw the hypodermic needle gently and discard into the sharps container immediately.
10. Apply direct pressure on the puncture site for 5 minutes using a sterile gauze.
11. Apply an adhesive plaster to the puncture site as required.
Note: Send paediatric specimens to the laboratory in a biohazard bag in a standard canister. Do not use the Epro canister.
Order of draw for heel-prick and finger-prick methods:
Lavender top microtainer (MAP) tube

Additive:
K2EDTA
Number of inversions:
10 times
Orange top microtainer tube
Additive:
Lithium heparin
Number of inversions:
5 times
Mint green top microtainer tube

Additive:
Lithium heparin
Number of inversions:
10 times
6 mL gold top tube
Additive:
Nil
Number of inversions:
5 times
Category A
Specimen Requirement
200 µL / 1 full orange top microtainer tube per bullet point
Instructions
- Hold the orange top microtainer tube horizontally or tilted slightly directly below the puncture site.
- Position the capillary 3 to 5 mm away from the puncture site.
- Fill the entire capillary with blood.
- Hold the tube upright to allow the blood to flow from the capillary into the tube.
- Turn the cap to remove and discard the preassembled capillary into sharps bin.
- Remove the cap from the base and seal the tube.
- Gently invert the tube 5 times.
- Send specimen to the laboratory immediately.
Test Case
- Bilirubin, direct*
- Bilirubin, total*
- Bilirubin, direct + Bilirubin, total*
*Protect specimen from light exposure
Category B
Specimen Requirement
600 µL / 1 full mint green top microtainer tube per bullet point
Instructions
- Fill the mint green top microtainer tube up to the ‘600’ mark.
- Gently invert the tube 10 times.
- Send specimen to the laboratory immediately.
Test Case
- Calcium, Total and Adjusted
- C-Reactive Protein
- Creatine Kinase*
- Magnesium
Phosphate
*Protect specimen from light exposure
Category C
Specimen Requirement
1200 µL / 2 full mint green top microtainer tube per bullet point
Instructions
- Fill the mint green top microtainer tube up to the ‘600’ mark.
- Gently invert the tube 10 times.
- Send specimen to the laboratory immediately.
Test Case
- Individual Test
- Folate
- Vitamin D
- Panel Test
- Lipid Panel
- Liver Panel
- Renal Panel
- Iron Panel
- Thyroid Panel
- Different common test combinations
- Liver panel + Direct bilirubin + GCT
- Liver panel + Direct bilirubin + GCT + Total Protein
- Renal panel + Calcium + Magnesium + Phosphate
- Renal panel + Chloride + Bicarbonate
- Uric acid + LDH
Category D
Specimen Requirement
1800 µL / 3 full mint green top microtainer tube per bullet point
Instructions
- Fill the mint green top microtainer tube up to the ‘600’ mark.
- Gently invert the tube 10 times.
- Send specimen to the laboratory immediately.
Test Case
- Different common test combinations
- Glucose (for OGTT) + serum insulin*
- Renal panel + Liver Panel
- Vitamin B12 + Folate
- Liver panel + Thyriod panel
- Liver panel + Thyriod panel + Renl panel
- Liver panel + Thyriod panel + Lipid panel
*Protect specimen from light exposure
Category E
Specimen Requirement
500 µL / 1 full lavender top microtainer (MAP) tube per bullet point
Instructions
- Fill the lavender top microtainer (MAP) tube up to the ‘500’ mark.
- Gently invert the tube 8 – 10 times.
- Send specimen to the laboratory immediately.
Test Case
- Individual Test
- Erythrocyte Sedimentation Rate (ESR)
- Different common test combinations
- Full blood count (FBC) + Erythrocyte Sedimentation Rate (ESR)
- Full blood count (FBC) + Peripheral blood film (PBF)
- Full blood count (FBC) + Reticulocyte count
Category F
Specimen Requirement
3 mL / 1 full 3 mL lavender top tube per bullet point
Instructions
- Fill the lavender top tube up to the mark.
- Gently invert the tube 8 – 10 times.
- Send specimen to the laboratory immediately.
Test Case
- Individual Test
- DNA analysis for alpha-thalassemia
- DNA analysis for beta-thalassemia
*Hard-copy consent form required
Category G
Specimen Requirement
3 mL / 1 full 3 mL lavender top tube per bullet point
Instructions
- Fill the gold top tube up to the mark.
- Gently invert the tube 5 times.
- Send specimen to the laboratory immediately.
Test Case
- Individual Test
- Insulin-like Growth Factor 1 (IGF-1)
*blood filled to just below tube label
Category H
Specimen Requirement
5 mL / 1 full 6 mL green top tube per bullet point
Instructions
- Fill the green top tube up to the mark.
- Gently invert the tube 8 – 10 times.
- Send specimen to the laboratory immediately.
Test Case
- Individual Test
- Chromosome analysis peripheral blood (karyotype)*
*Hard-copy consent form required
Urine Culture
Collection instruction
- Clean the genital area with water. Do not use detergent or antiseptic.
- Collect midstream urine in a sterile container (no preservatives).
- Send specimen to the laboratory immediately, in red biohazard bag.
Minimum volume: 0.5 mL
Optimum volume: 3–5 mL
Note: If both urine phase contrast and urine culture are required, please send specimens in separate containers.
Urine Phase Contrast
Collection instruction
- Collect midstream urine in sterile container (no preservatives).
- Send specimen to the laboratory immediately.
Specimen must reach WH laboratory by 12:00 pm on Monday to Friday. Test requests will be rejected if specimens arrive after 12:00 pm. Test requests are also rejected if received on Saturdays, Sundays and public holidays.

